Tutorial to Learn to draw Hand Proportions
Sponsored
Tutorial to Learn to draw Hand Proportions
Recently I gave you some tips on how to draw hands. Seems many of my students and readers devoured these tips and ask now for more. Especially they asked me to go into the details of drawing hands. So let’s have a look at it.
When drawing hands, the biggest obstacle is the proportions of all the fingers and small details. In this article, I’ll show you the most important details you need to pay attention to for best results.
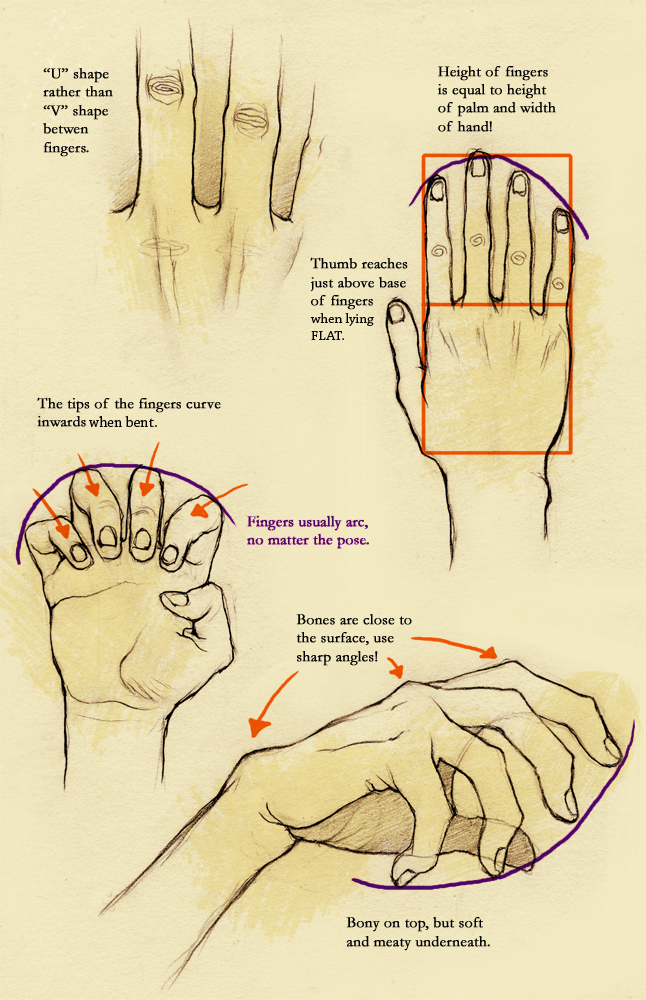
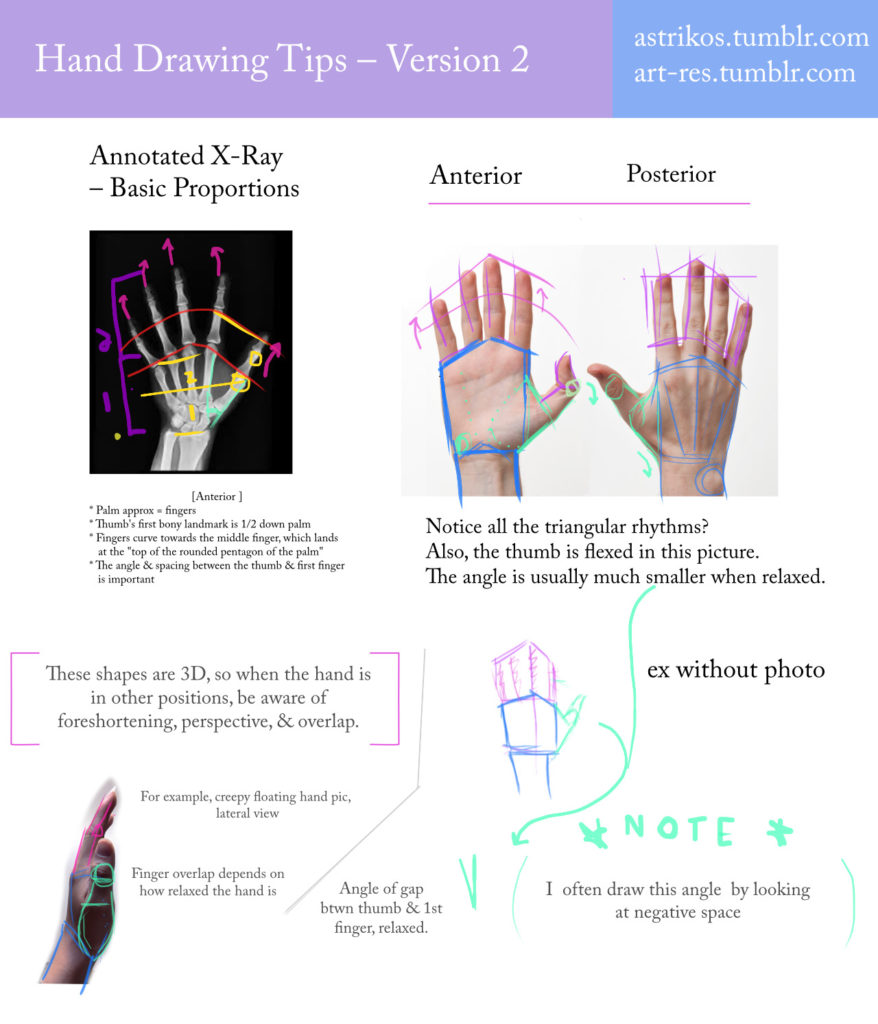
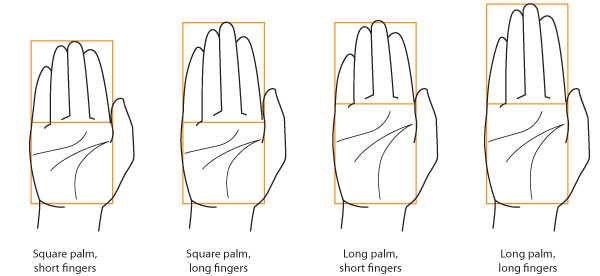
When drawing a relaxed hand, you can imagine the palm as a square and then add the fingers. In this case, the middle finger is about as long as the square of the palm (with some deviations depending on the individual hand’s proportions and its position – remember the magic trick in my last article on drawing hands).
As longest finger the middle finger is also a great reference for understanding the proportions of all other fingers:
The little finger is about two thirds to three-fourths of the middle finger
The ring finger and the index finger are always longer than the small finger and shorter than the middle finger.
But the exact sizes vary – some people’s ring fingers and index fingers are equally long, some have longer ring fingers, others have longer index fingers. I’ve even heard of people making fun out of inferring physical or mental abilities from the length ratio between the index finger and ring finger. Fortunately, my are both equally long so I am on the safe side 😉
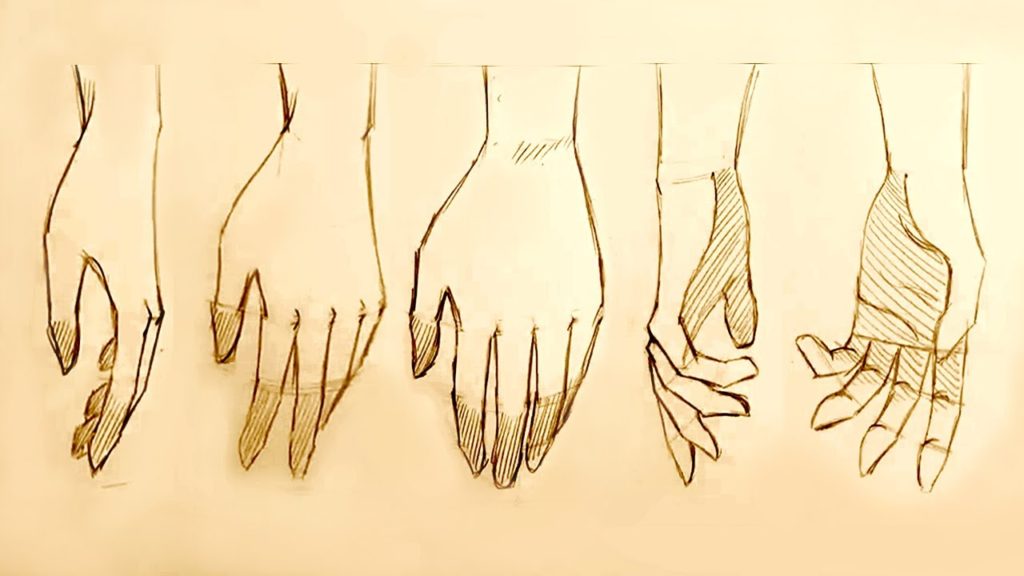
Due to the different lengths of the fingers, the fingertips form a c-shaped curve when lying next to each other.
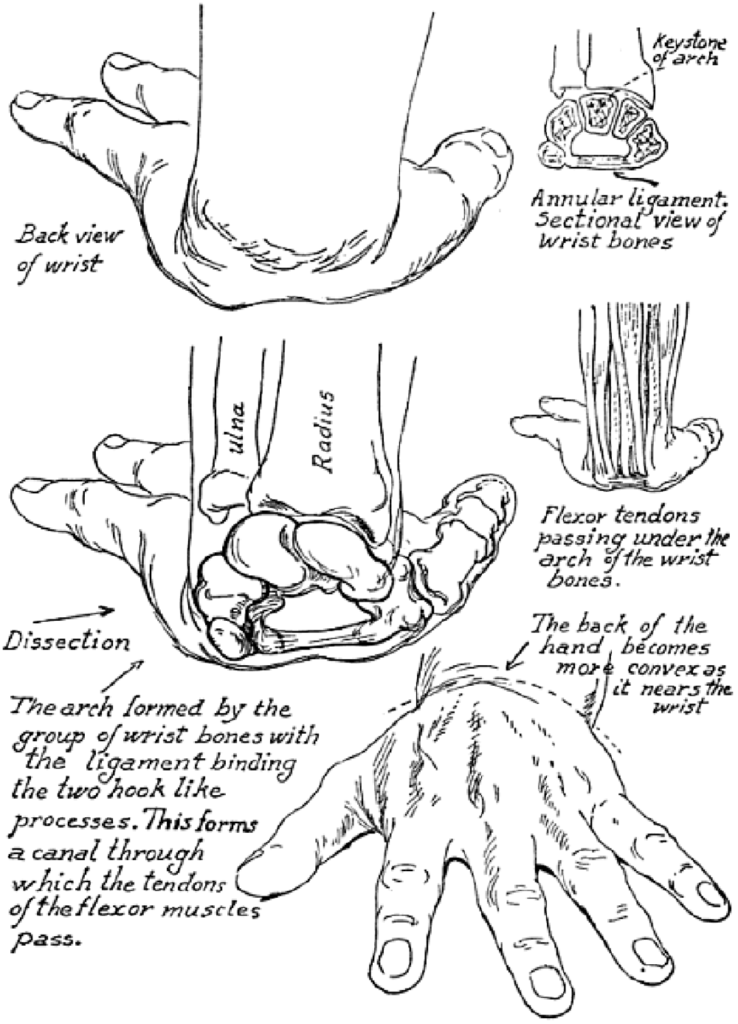
Something similar for the fingers’ roots: the index finger’s and the middle finger’s root are topmost, the other fingers’ roots are a little bit lower so the finger roots form a curve that bends downwards, too. And the knuckles form the same curve, of course.
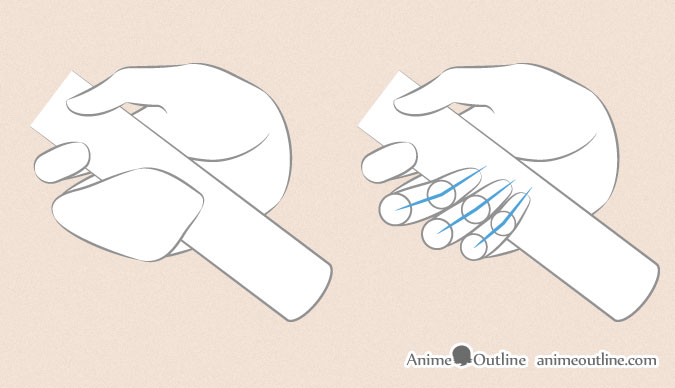
Now that we have added all fingers, let’s have a look at the thumb. Unlike the other fingers, it is attached to the side of the palm. Its root occupies the lower half of the hand’s side. Having only two joints it has also more volume and strength.
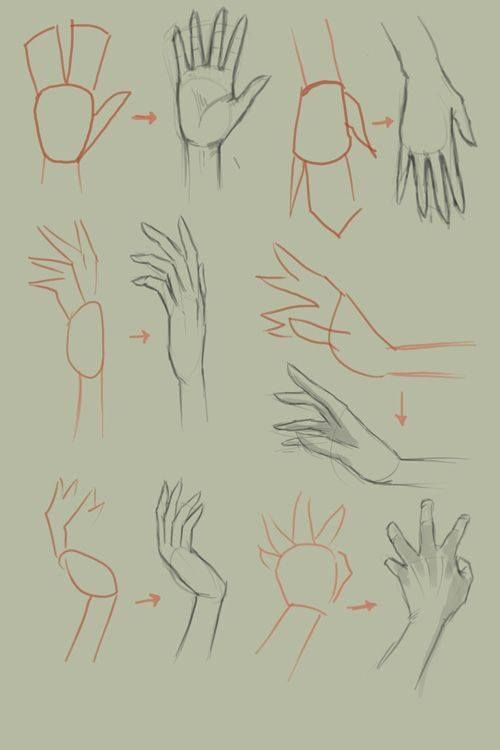
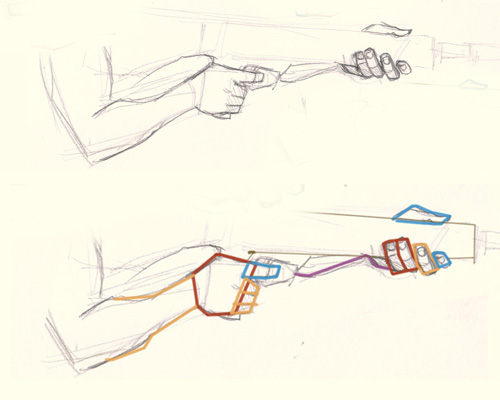
Using these instructions you can sketch the basic structure of any hand you want to depict. But when filling this first outline, please keep in mind: although I wrote about squares and lengths, etc., the hand’s shape isn’t exactly geometrical.
There should be no hard edges or straight lines in your picture. The muscles and flesh on the hand’s bones form round and voluminous shapes. Intensify these forms by adding strong shading. Look where shadows form on your hand and add these shadows.
Important: The skinnier a hand is, the fewer volume the drawing should have. So adjust the level and darkness of shadows accordingly. Also, you need to adjust the shading if the hand is very muscular (e.g. hands of bodybuilders or sportsmen) and for very fleshy hands that have only a few lines and wrinkles in the skin.
Hope these tips and tricks help you to draw better hands from now on.
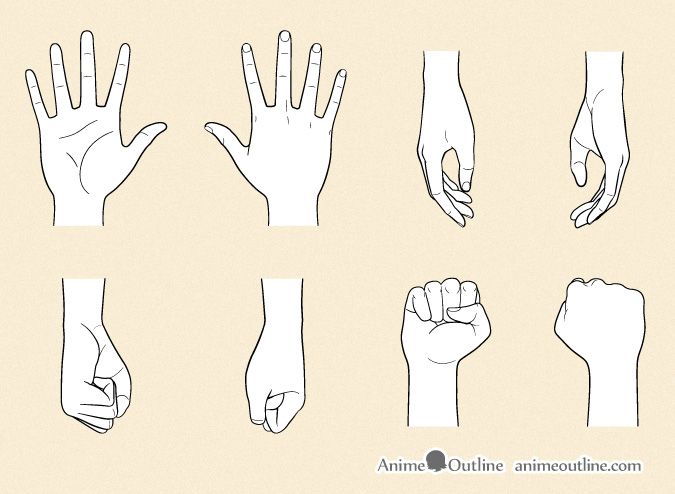
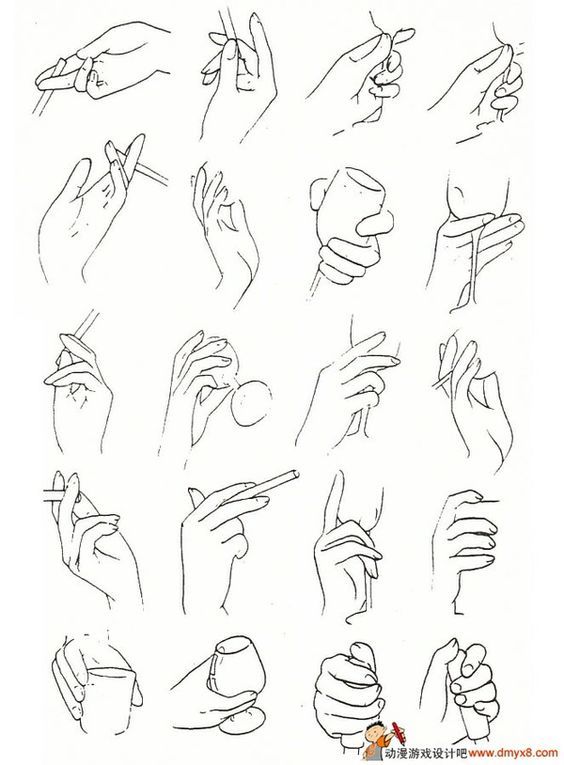
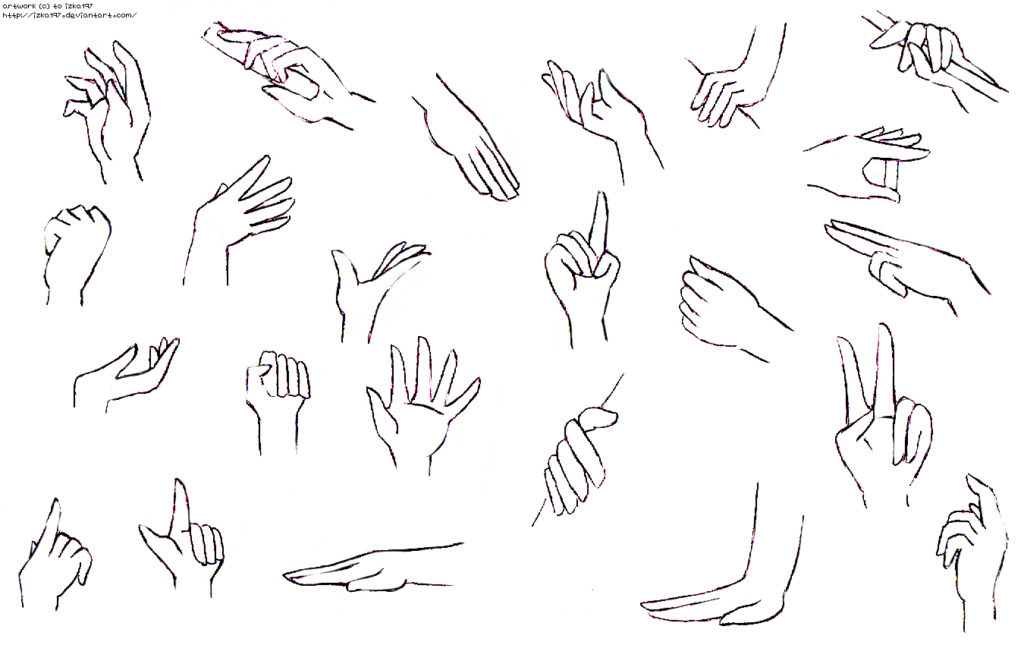
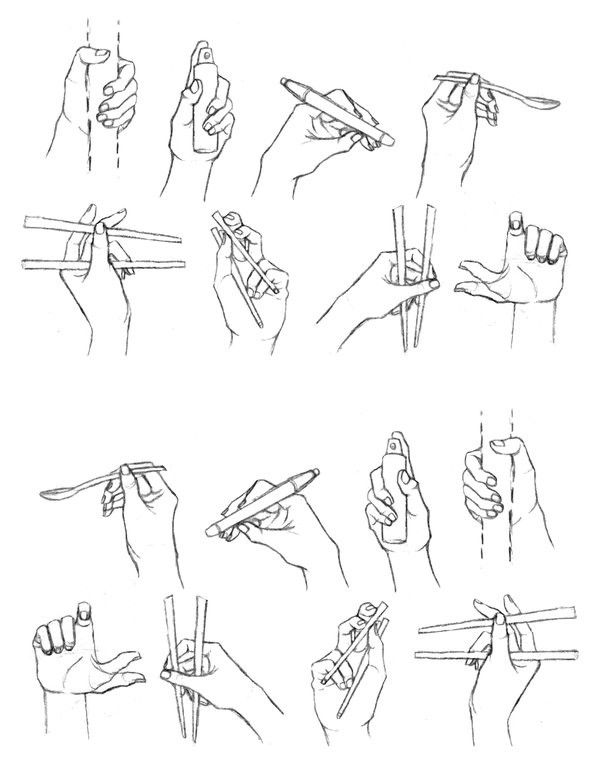
Examples of Hand Proportions:
![]()