Sketching on Location – Sketching People Part 2
Sponsored
Sketching on Location – Sketching People Part 2
In this part of sketching on location, it is quite hard because I am not really used to using stick lines and this type of drawing. For a first-timer like I must pay attention to details and practice on the techniques on how to make this type of drawing.
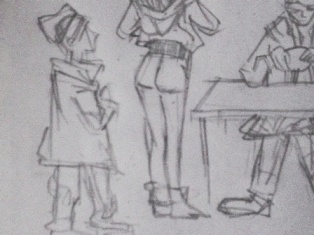
I have learned that the surface lines of the drawing are important. The surface lines are the lines wrapping around the form. As I drew the arm of the kid I have used a cylinder with surface lines on top. The good thing about this is that it makes the arm rougher and through that, I was able to emphasize the gesture of the kid. Usually, the shapers and material of kids coat are different than those of adult so in my drawing, I have learned that for my drawing to look like a kid’s coat I have to use squiggly lines. I have tried that in my drawing and it does have an effect. From the drawing, one can tell that I have drawn a kid.
At first, it is kind of hard for me to use this lining technique. This line technique should be really loose and as much as possible I should not lift the pen much which makes the sketching real fast. But at first I have difficulty following this step so I put extra effort on it and tried it many times. I believe through time I’ll improve.
As I discovered more about sketching on location I have learned that it is not just simple sketching but it gives me an opportunity to explore and experiment. There is no rule in sketching on location so doing an experiment that will enhance my drawing is possible. This is one advantage of sketching on location being free from any rules and just doing every possible way to improve.
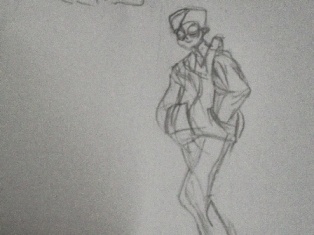
As I have said since no rule must be followed I am free to experiment and do things I am comfortable with to make my drawing easy. It is up to me. By this, I have tried experimenting on how to draw a man and just play with lines to enhance its appearance.
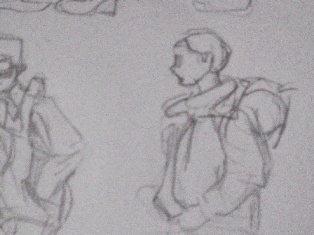
I have found a way of sketching the legs too, at first I drew a bigger shape than I just used a line to separate it by using the line. I have learned that I must draw first the outer shape before working on the center or inside details. Sketching the legs takes practice also, the shape of the legs may look easy but sketching it is hard.
The third character I have drawn was the woman with her purse swinging. I have followed the instruction to just use a shape that resembles ‘arm’ instead of capturing her exact limb. I may have drawn well the exact limb if I have not known this fact. Since this is just sketching so using shapes that represent arm is fine as long as it does resemble arm at some point.
The fourth character was a man that was looking down. In my drawing, I have focused on that gesture right away. What I have done at first is to get a clear idea of its overall gesture then after that, I have started sketching on it with the focus on what was the man doing.
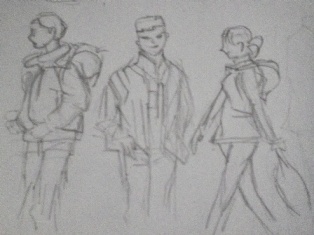
I have learned that in order to add enhance more the details I have to use simple shapes. In sketching this is the best way to follow in order to draw faster as much as possible.
In drawing the knees of the 6th character which is a girl I have followed the principle of Straight vs. Curved. By this, I have emphasized more details in the knee although I have use simple stick figures only.
In sketching on location one must grab every opportunity to enhance the drawing and how to do it fast. And Straight vs.Curved principle is one technique to use to enhance that drawing. Although sketching on location is hard but I believe with much practice once can master this type of drawing.