How to Draw a Cobra Step by Step
Sponsored
How to Draw a Cobra Step by Step
Snakes are such scary creatures. And what snake is the king of all snakes? Well, the cobra of course. I’m not talking G. I . Joe’s evil nemesis either. I’m talking slither around on the ground and bite your snake. Snakes really do freak me out, so why not draw one? In this drawing tutorial, we’re going to take a look at drawing a cobra.
Looking for a different animal to draw? Be sure to check out the how-to-draw animal’s page. Let’s go ahead and get started with that cobra.
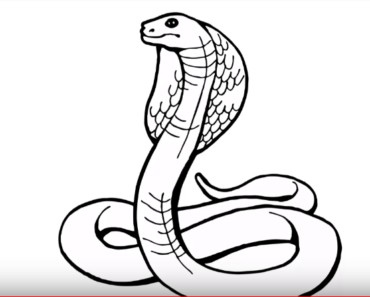
Begin your drawing by focusing on the hood and head area of the snake. I used a photo reference for this drawing. You are welcome to follow along with this one or find a reference photo to draw from. The hood portion of the cobra is a shape that is similar to a stretched diamond shape with a rounded bottom. The head fits in the top portion of this shape.
In this step of the drawing, we can draw the body of the snake. Be sure to let the body look natural by having it wrap around itself. Be careful and try to keep the body of the cobra consistent in width until you get to the tail portion.
Now, we’ll begin to add some of the details on the cobra. Add a couple of evil snake eyes, and draw the ribs that go down the center of the snake. You can also add a line for the part of the mouth that can be seen in this view.
Now we can add the scales and patterns on the cobra’s body. Notice that the scales are larger and more pronounced on the head of the snake. The patterns on the hood can vary from cobra to cobra, so feel free to be creative here. You can indicate the scales on the body by placing groups of scales here and there around the body.
You now have enough information in your drawing to finish the drawing of a cobra. You may choose to go over your lines with ink or another dark drawing medium. You can also erase any lines that you no longer need to complete the drawing.
Sponsored